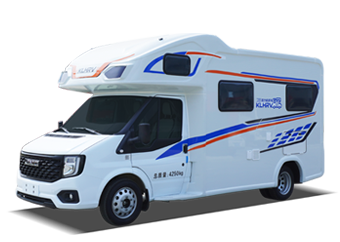





【 Operation Instructions 】 Kailifeng Series Road Sweeper Operation Demonstration
Kailifeng Road Sweeper
Operating Instructions And Maintenance
1、 Product Introduction
The "Kailifeng" Series Road Sweeper Is A Large-scale Road Cleaning Equipment Developed And Produced By Hubei Kaili Special Purpose Vehicle Co., Ltd. According To Market Demand, Which Combines Dust Removal, Suction, And Scanning. It Is Mainly Suitable For Mechanized Cleaning And Cleaning Operations Of Urban Roads, Highways, Municipal Squares, Large Factories And Mines, Airports, Docks, Tunnels, Bridges And Other Road Surfaces.
2、 New Car Running In
To Achieve The Expected Performance Indicators And Extend The Service Life Of The Road Sweeper. The New Road Sweeper Must Be Run In During The Initial Use. The Running In Mileage Of The Car Chassis Is 1000 Kilometers. Please Refer To The Accompanying Vehicle Chassis User Manual For Break In And Maintenance After Break In. The Running In Of The Dedicated Working Device Has Been Completed Before The Product Leaves The Factory, And Users Do Not Need To Perform Further Running In. The Running In Time For The Auxiliary Engine Is Twenty Hours. Please Refer To The Engine Manual For Running In And Maintenance After Running In.
3、 Operating Instructions
01 Operating Device Instructions
The Kailifeng Series Road Sweeper Operating Device Is Mainly Distributed In Two Places. The First Place Is The Cab Operating Box, Which Is Mainly Used For Cleaning Operations And Garbage Bin Unloading Operations. The Second Place Is The Rear Side Operating Box Of The Garbage Bin, Which Is Mainly Used For Returning The Garbage Bin After Unloading And Closing The Rear Door Of The Garbage Bin.
Preparation Before Homework 02
Before Driving, The Following Checks And Preparations Should Be Made:
1. Check Whether The Tire Nuts, Fastening Bolts, And Pin Shafts Are Loose, And Tighten Them If Necessary; Check Whether The Appearance And Air Pressure Of The Tires Meet The Requirements.
2. Check Whether The Suction Cup Support Wheel And The Sweeping Disc Brush Are Excessively Worn.
3. Check The Entire Vehicle For Any Water, Oil, Or Gas Leaks, And Eliminate Them If Necessary.
4. Check The Fuel Level, Cooling Water, And Oil Level Of The Main And Auxiliary Engines, And Add Oil And Water If Necessary.
5. Check If The Belt Tension Progress Of The Auxiliary Engine And Fan Is Appropriate, And Adjust It If Necessary.
6. Check If The Hydraulic Pump Ball Valve Is Open And If The Water Tank Outlet Ball Valve Is Open.
7. Check If The Cleaning Water Is Sufficient.
Attention: When The Hydraulic Pump Ball Valve Is Closed, The Hydraulic System Cannot Function Properly. The Water Outlet Ball Valve Of The Clean Water Tank Is Not Open, Which May Cause Damage To The Diaphragm Pump And Other Malfunctions.
03 Water Injection Operation
The Fire Hydrant Water Injection Method Involves Connecting One End Of A KD65 Standard Joint Hose To The Fire Hydrant Interface And The Other End To The Water Inlet Of The Water Tank. First, Open The Water Inlet Ball Valve Of The Water Tank, And Then Open The Fire Hydrant Ball Valve To Inject Water Into The Water Tank. During The Water Injection Process, Attention Should Be Paid To The Progress Of The Water Level Rise In The Water Tank Measuring Pipe. When The Maximum Mark Is Reached, Close The Fire Hydrant Ball Valve, And Then Close The Water Inlet Ball Valve.
Attention: The Water Level In The Water Tank Should Be Regularly Observed Through The Water Tank Gauge To Avoid Working Without Water.
04 Cleaning Operation
After Driving To The Work Section, The Vehicle Stops And The Gear Lever Is In Neutral. Lift The Handbrake Lever And Confirm That The Chassis Air Pressure Is ≥ 0.8MPa.
Attention: Before Starting, Observe The Surroundings Of The Road Sweeper To Ensure That There Are No Obstacles Or Personnel That Affect Safety, And The Tail Arrow Warning Light Must Be Turned On.
1. Turn The "auxiliary Engine Start" Key Switch To The "on" Position, Turn On The Power Switch Of The Main Control Box, And Connect The Auxiliary Engine Circuit. At This Time, The "refueling Pressure" And "charging Indicator" Lights Are On.
2. Turn The "auxiliary Engine Start" Key Switch To The "start" Position And Hold It. After Starting The Auxiliary Engine, Release It Immediately. The Key Switch Will Automatically Return To The "on" Position, And The Engine Will Run Normally.
Attention: The "off" And "on" Buttons Under The "auxiliary Machine Start" Key Switch Are Positioning Switches, And The "start" Button Is A Reset Switch. After Releasing The Button, The Switch Will Automatically Reset.
Attention: The Key Switch For "auxiliary Engine Start" Should Not Be Held In The "start" Position For More Than 10 Seconds. If The Auxiliary Engine Still Fails To Start After 10 Seconds, Release It Immediately. After Waiting For Fifteen Seconds, Turn The Key Switch To The "off" Position First, Then To The "start" Position, And Restart.
Attention: The Auxiliary Engine Must Idle For Three To Five Minutes Before It Can Function Properly.
3. Rotate The "left Front Scan", "right Front Scan", And "suction Cup" Switches To The "down" Position In Sequence And Hold Them. Lower The Left And Right Scanning Disk Devices And The Tail Suction Cup Device.
Attention: The "left Front Scan", "right Front Scan", And "suction Cup" Switches Are Reset Switches. When The Switch Is Turned Left Or Right, The Actual Situation Of The Corresponding Operating Device "up" And "down" Should Be Closely Observed. When It Is Necessary To Stop The Action, Simply Release It And The Switch Will Automatically Reset.
4. Turn The 'Scan Disk' Switch Left To The 'Full Scan' Position And Start The Scanning Process.
5. Turn The "working Mode" Switch To The "low Speed" Position, Press The "water Pump 1", "water Pump 2", And "water Pump 3" Buttons In Sequence, The Button Indicator Light Will Turn On, And The Sweeping And Spraying Device Will Start Working.
6. Turn The "remote Throttle" Of The Auxiliary Engine To The Right (or Lift The Throttle Lever Of The Auxiliary Engine), And Increase The Throttle Of The Auxiliary Engine To 2000 Revolutions Per Minute.
7. Start The Vehicle, Select The Appropriate Low-speed Gear, Slowly Release The Clutch Pedal, Release The Handbrake, And Start The Cleaning Operation At A Speed Of (3-15Km/h).
Attention: The "Scan Disk" And "Working Mode" Switches Are Positioning Switches, And The Switches Will Not Automatically Reset And Rotate To The Desired Position.
05 Stop Homework
After Completing The Homework, Or When The Sewage In The Garbage Bin Reaches Its Maximum Height, The Work Should Be Stopped.
1. Turn The "remote Throttle" Of The Auxiliary Engine To The Left (or Release The Throttle Lever Of The Auxiliary Engine), And Lower The Throttle Of The Auxiliary Engine To Idle State.
2. Turn The "Scan Disk" Switch To The Right And Turn Off The "Full Scan" Mode.
3. Press The "Water Pump 1", "Water Pump 2", And "Water Pump 3" Buttons In Sequence, The Button Indicator Will Turn Off, And The Sweeping And Spraying Device Will Stop Working.
4. Turn The 'Work Mode' Switch Left To The 'High Speed' Position.
5. Turn The "left Front Scan", "right Front Scan", And "suction Cup" Switches Left To The "up" Position And Hold Them. Lift The Left And Right Scanning Disk Devices And The Tail Suction Cup Device.
6. Turn The "auxiliary Engine Start" Key Switch To The "off" Position, Turn Off The Auxiliary Engine, And Stop The Cleaning Operation.
06 Unloading Operation
Park The Vehicle In A Suitable Location For Garbage Disposal, With The Transmission In Neutral And The Parking Brake Lever In The "park" Position.
1. Turn The "auxiliary Machine Start" Key Switch To The "on" Position And Turn On The Power Switch Of The Main Control Box.
2. Turn The "auxiliary Engine Start" Key Switch To The "start" Position And Hold It. Release It Immediately After Starting The Auxiliary Engine.
3. Rotate The "rear Door" Switch To The Left And Hold It. After The Rear Door Is Opened, Release It To Drain The Sewage Completely.
4. Rotate The "big Box" Switch To The Left And Hold It. Once The Big Box Is Raised To The Desired Position, Release It To Empty The Garbage Inside.
5. After Cleaning The Box, Turn The "big Box" Switch To The Right And Release It After The Big Box Is Lowered Back To Its Original Position.
Note:
1. To Protect The Safety Of Vehicles And Unloading, It Is Strictly Prohibited To Lift Large Boxes On Slopes Or Uneven Roads When Dumping Garbage.
2. Before Lifting The Large Container, You Should Get Off The Car And Check For Pedestrians Or Obstacles Behind The Vehicle.
3. The Unloading Operation Should First Open The "rear Door" And Then Lift The "large Box".
4. The "large Box" And "rear Door" Switches Are Reset Switches. When The Switch Is Turned Left Or Right, The Actual Situation Of The Corresponding Operating Device "up", "down", "open", And "close" Should Be Closely Observed. When It Is Necessary To Stop The Action, Simply Release It And The Switch Will Automatically Reset.
5. After Completing The Homework, It Is Necessary To Clean The Car Body And The Interior Of The Large Box In A Timely Manner, Especially The Rear Door Seal And Fan Seal, Which Must Be Cleaned Thoroughly To Avoid Foreign Objects Causing Poor Sealing And Affecting The Suction Effect.
4、 Maintenance And Upkeep
01 Maintenance Of Chassis And Engine Parts
Follow The Requirements Of The Car Chassis And Engine Manual For Maintenance. For Sanitation Vehicles, The Cleaning Of The Main And Auxiliary Engine Air Filters Should Be Carried Out Every 10 To 25 Hours Of Operation Based On The Severity Of Dust In The Working Environment. And After About 300 Hours Of Homework, Replace The Main And Auxiliary Engine Air Filters. Replace The Main And Auxiliary Engine Oil And Filters Every 200 Hours Of Operation. Replace The Fuel Filters Of The Main And Auxiliary Engines Every 400 Hours Of Operation.
02 Installation And Maintenance
1. Daily Maintenance And Upkeep
(1) Check The Entire Vehicle For Any Oil, Water, Or Gas Leaks, And Eliminate Them If Necessary.
(2) Clean The Interior Of The Garbage Bin, Filter Screen, Suction Tube, Vehicle Body, Rear Door Sealing Strip, And The Exterior Of Each Assembly.
(3) Check The Fuel, Cooling Water, And Oil Levels Of The Main And Auxiliary Engines, And Add Them If Necessary.
(4) Check The Tension Of The Fan And Water Pump Drive Belts And Adjust Them If Necessary.
(5) Check If The Water Filter Cover Is Damaged Or Leaking, And Replace It If Necessary; Open The Drain Switch At The Bottom Of The Water Filter To Completely Remove Impurities From The Filter.
(6) Check The Tightness Of Tire Nuts, Fastening Bolts, And Saddle Bolts.
(7) Check The Wear Of Suction Cup Consumables (front And Rear Baffles, Suction Cup Wheels, Suction Tubes, Connecting Pipes) And Replace Them If Necessary.
2. First Level Maintenance
Every 50 Hours Of Homework, In Addition To Performing Daily Maintenance, It Is Also Necessary To
(1) Check The Ground Clearance And Lifting Height Of The Suction Cup, And Adjust The Height Of The Supporting Wheel.
(2) Check The Lubrication Condition Of The Fan Bearing Seat.
(3) Check The Oil And Lubricant Levels Of The Main And Auxiliary Engines And Chassis Assembly, And Add The Specified Model Of Oil And Lubricant If Necessary.
3. Secondary Maintenance
Every 50 To 100 Hours Of Homework, In Addition To Following The First Level Maintenance Operation Procedures, It Is Also Necessary To
(1) Check The Grounding Imprint Of The Brush, Adjust The Tilt Angle And Ground Clearance Height Of The Scanning Disc. Check The Wear Of The Brush And Replace It If Necessary.
(2) Remove The Filter Element Of The Water Filter For Cleaning, Check If The Clamp At The Connection Between The Steel Pipe And The Cloth Hose Or Transparent Steel Wire Hose Is Loose, And Tighten It If Necessary.
(3) Check The Tension Of The Belt And Adjust It If Necessary. If The Fan Vibrates Greatly, The Dust On The Fan Impeller Should Be Checked And Cleaned. Check The Dynamic Balance And Bearings Of The Impeller.
(4) Check If The Connecting Bolts On The Upper Assembly Are Loose, And Tighten Them If Necessary.
(5) Lubrication And Maintenance Work, The Lubrication Points Are Generally The Rotation Of Various Mechanisms, And The Moving Parts Are Usually Equipped With Oil Nozzles, Such As Oil Pump Bearing Seats And Power Output Bearing Seats. Sweep Disk Motor Bearing Seat, Fan Bearing Seat, Suction Nozzle Wheel Bearing, Etc. The Exposed Threaded Parts That Need To Be Adjusted, Such As The Sweeping Disc And Suction Nozzle, Should Be Coated With A Small Amount Of Lubricating Grease For Rust Prevention Treatment.
(6) The Work Of The Rear Door Latch Is Sliding Friction. And A Small Amount Of Lubricating Grease Should Be Applied To Areas Without Oil Nozzles To Reduce Wear. Apply Butter To The Sealing Strip At The Outlet Of The Rear Door And Fan Outlet Nozzle To Reduce Wear, Misalignment, And Adhesion.
4. Third Level Maintenance
For Every 1000 Hours Of Work, In Addition To Following The First And Second Level Maintenance Procedures, It Is Also Necessary To
(1) Replace The Hydraulic Oil In The Hydraulic System.
(2) Replace The Suction Oil Filter And Clean The Hydraulic Oil Tank.
Before Entering Winter And Stopping The Vehicle, Follow The Product Manual To Perform Waterproof And Antifreeze Operations, And Drain Any Remaining Water In The Water Circuit, Water Pump, Water Valve, Nozzle, And Other Components.
03 Maintenance Precautions
1. When The Engine Is Running, Maintenance Or Repair Of The Chassis Auxiliary Engine, Water Pump, And Hydraulic System Is Not Allowed.
2. When Cleaning The Vehicle, Do Not Use High-pressure Water To Directly Flush The Top Of The Hydraulic Oil Tank, Auxiliary Engine, Radiator, Solenoid Valve, Coil, And Terminal Parts.
3. To Ensure The Safety Of Operators And Equipment, It Is Necessary To Open The Safety Pole Under The Garbage Bin During Debugging, Installation, Testing, And Maintenance Operations. Secure The Safety Pole With A Safety Pin To Ensure The Safety Of Personnel And Equipment. Before Resetting The Trash Can After Homework, The Safety Pole Should Be Lowered First.
4. Disassemble The Hydraulic System, Such As Hydraulic Pipelines And Valves. Each Mechanism Should Be Placed In The Lowest Position And Reliably Supported, And The Hydraulic System Should Be Depressurized.
Due To The Lower Driving Speed Of Sanitation Operations And Vehicle Operations Compared To Regular Cargo Trucks, And The Harsher Working Environment. Therefore, The Maintenance Cycles At All Levels Are Divided Based On The Actual Operating Hours, And Users Should Establish Usage, Maintenance, And Repair Records For Each Vehicle. Regular Maintenance And Upkeep Should Be Carried Out, And The Maintenance Cycle At All Levels Can Be Appropriately Shortened According To The Actual Usage Conditions In The User's Location.
To Fully Utilize The Technical Performance And Benefits Of Road Sweepers And Extend Their Service Life, Users Should Perform Regular Maintenance And Upkeep Of Road Sweepers According To The Maintenance Cycle And Items Specified In The Operating Manual.
-
The 'perpetual Motion Machine' Is Activated! Kaili After-sales Service Enables Customers T
2025-11-25
-

【 Zhuanqi News 】 It's Hot! Suizhou Intelligent Manufacturing Dominates The Screen In Beijing, A
2025-11-20
-

【 Overseas Recruitment 】 Kaili Automobile Group Overseas KD Factory Social Recruitment Notice!
2025-11-03